Well...it may have taken a little time to get around to, but it's here like I promised! CHRISTMAS CRAFTS! Possibly the most joyful of the crafts. There are so many more that I'd like to embark on, but time gets away so fast these days. The Christmas craft ideas are ENDLESS!! I get almost as excited about Christmas crafts as I do about delicious goodies...and that's saying a lot. Here are just a few that I've created between last Christmas and this Christmas.
First, my beaded wire tree. This was surprisingly easy to do and turned out really cool looking.
I made this last Christmas and I honestly can't remember where I got the idea. First, you get a piece of carboard or really thick paper of sorts and cut it into a triangle (the size of the triangle should be the size that you want your tree to be). Next, go crazy!! Start wrapping wire and whatever you else you can find around the triangle until it looks like you want it to. I got a package of wire from Michaels that had all different colors of wire in it. I also got some wire of different thicknesses to add a more unique texture. To add more color, I threw in a few beaded strands with the occasional button. Lastly, add the star. I found this little wooden star at Michaels and painted it gold with acrylic paint. I then wrapped it in gold wire and attached it to the top of my tree with more wire. Once you're finished with that, carefully lift your beaded creation off of the cardboard triangle. Isn't it lovely? Next, get a dowel. I think I got this one at Hobby Lobby. I painted it brown and cut it to the length that I wanted it. I placed the tree on the wire. I got the wooden cube at Michaels and painted it green then sanded it down to give it a more rustic feel. I then...I take that back...I got my brother to drill a hole in the cube that was the same width as the dowel. Put the dowel with the Christmas tree on it into the hole in the cube and voila!!! Pretty cool!!
I made this Christmas wreath this past summer. What else was I supposed to do when my husband was at work and I was home alone?? I got the idea in a magazine. Here's the link to the directions:
I'm not gunna lie...wrapping this foam wreath in yarn took like 2 straight days. I was so happy when I finished. I got all of the supplies at Hobby Lobby. The pick with the berries was amongst the Christmas supplies. It is now hanging on my carport door and I love it. It's so much more fun to make things than to buy them, in my opinion. People just have the best ideas these days...too good to pass up!
Next I made this Christmas card holder
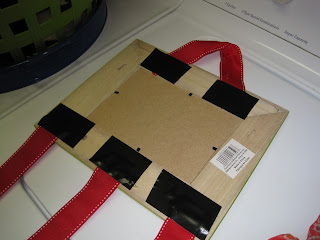
I came up with this idea myself. It's amazing how inspired you can be while standing alone in Michaels staring at endless amounts of craft supplies. Side note...I practically live in the Michaels near my house...like it's embarassing how much I go there. Two visits ago when I was checking out and ready to leave, the cashier told me "see you in a few days"...I didn't know whether to laugh or be like...wow...that really is embarassing...they know me here. That didn't stop me though! I still go there all the time (however, now I'm careful to avoid that employee who ALWAYS seems to be there when I go). I'm pretty sure I'm their main source of income so they should love me. Anyways, I bought this frame in the wood aisle and painted it lime green with white polka dots. After that, I sanded it a little to make it look different. Then I got some cute red ribbon and hot glued and gorilla taped it to the back of the frame so that it hangs down. I also put some ribbon at the top so that I could hang it. I attached the Christmas cards to the long ribbon hanging down with clothes hangers. To top it off, I added a picture of Matty and me in front of the Opryland Christmas tree.
These don't have directions...they're just a few canvases/hanging signs that I've made over the years
This I painted on a scrap piece of wood that I found at my dad's garage:
Last Christmas I also made this little felt owl friend. I didn't really follow any sort of directions for this. If know how to use a needle and thread, you can make this. I've decided that I'm going to make a felt ornament every year from now on...just for fun :)
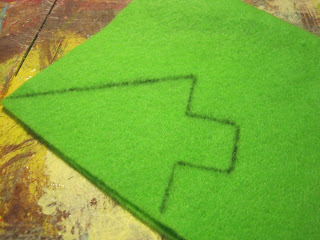
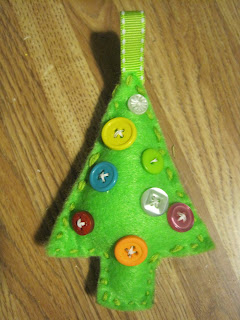
Here's a little picture tutorial of this year's felt ornament:
These last 2 things I got from Pinterest.
First, I made this keepsake ornament from our wedding.
This was so simple! I got a clear ornament from Michaels that cost about $1. I then got a spare wedding invitation and cut it up and put it in the ornament. I had some leftover ribbon from the wedding that I added as well. I also used the ribbon to tie a little bow at the top. To finish it off, I added some clear seed beads to sit at the bottom. Just like that you have a new ornament that you will treasure forever!!
Lastly, I made a time capsule ornament.
I got this clear ornament at Michaels that cost $1, as well. It comes apart so that you can easily put whatever you want into it. I decided that I'm going to make one of these every year as well with our Christmas card and another photo. I printed these pictures at Walgreens.com in the wallet size...perfect! I printed a mini Christmas card and the same picture of us in front of the huge tree. I also wrote 2011 on the tree picture (you can see it above). To finish it off, I put some red and lime green ribbon in it to fill up space and tied a red/green/white cord in a bow at the top. You can add whatever trinkets you like to it! Anything that represents the year. It'll be so neat in the future to have one for every year that we can look back on and remember the good ole days.
Anyhoo, this concludes my segment on Christmas crafts! Hope yall enjoy and have a very merry Christmas!


No comments:
Post a Comment