Words can't describe how much I love October. So many wonderful things happening: Cool weather after the summer heat (which means boots, scarves and cute clothes), beautiful leaves, pumpkins, my birfday, the holidays are coming!!
Am I forgetting something? Oh yes. AND HALLOWEEN!!
I take Halloween very seriously. Therefore, I take our costumes very seriously. They HAVE to be good and I like to make them myself. It's so fun. I even make costumes for my dog (don't judge me). I like to start thinking about them and sometimes go ahead make them in July to get a head start on things. I may or may not be writing this in July as well. I'll never tell.
I love decorating the house for every season as well and fall is my favorite!! Every house needs a little October lovin! Before I tell you about our costumes, here are my decorations this year:
Dining room table.
.jpeg)
Our house from the street.
.jpeg)
I cut these Monsters Inc monsters out of black poster board. My neighbors probably think I'm a freak.
.jpeg)
I love painting pumpkins.
.jpg)
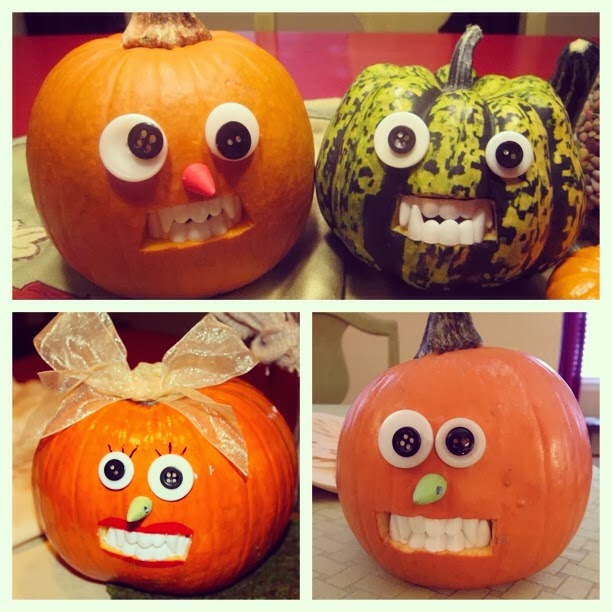
And carving pumpkins.

I make one of these every year. 2 years ago I made Norb and Edith (top), last year we had Edna (bottom left), and this year there's Otis.

A little October collage.
.jpeg)
Am I forgetting something? Oh yes. AND HALLOWEEN!!
I take Halloween very seriously. Therefore, I take our costumes very seriously. They HAVE to be good and I like to make them myself. It's so fun. I even make costumes for my dog (don't judge me). I like to start thinking about them and sometimes go ahead make them in July to get a head start on things. I may or may not be writing this in July as well. I'll never tell.
I love decorating the house for every season as well and fall is my favorite!! Every house needs a little October lovin! Before I tell you about our costumes, here are my decorations this year:
Dining room table.
.jpeg)
Our house from the street.
.jpeg)
I cut these Monsters Inc monsters out of black poster board. My neighbors probably think I'm a freak.
.jpeg)
I love painting pumpkins.
.jpg)
And carving pumpkins.

And gluing things to pumpkins.
I make one of these every year. 2 years ago I made Norb and Edith (top), last year we had Edna (bottom left), and this year there's Otis.
A little October collage.
.jpeg)
Now on to the 'stumes.
In the past we were Lego people and Nerds candies and my dog was an Ewok. Here are the links to those:
http://katiehedge.blogspot.com/2012/11/halloween-2012-costumes.html
http://katiehedge.blogspot.com/2011/11/legos.html
http://katiehedge.blogspot.com/2011/11/legos.html
.jpg)


I went through a few ideas this year. I first thought of Mickey and Minnie or Barbie and Ken. I guess it makes sense that Matt wasn't exactly up for those. They were too predictable anyways. Then I thought I was set on bacon and eggs. Who doesn't love bacon and eggs? After more thought it still just wasn't right. Then I saw an idea online and was sold.......MINIONS!
I found a blog online of a woman who made little minion outfits for her kids. I didn't really think about how they were so small and I'd be making them for a grown man and me. Just a little difference in sizes. I kind of made it up as I went using the blog I had found as a reference. Hers were different from mine. It was a lot of work but I love how they turned out and they were worth the many glue gun burns I got as a result. If you have the time and patience, anyone can make them. I got everything (except for the oats...will explain later) at Hobby Lobby. Here's what you need and how I made them:
Supplies for 2 adult Minions (appx $30 each):
1 inch Poly Foam-1 package per minion (this foam is $16 per package so use your 40% off coupon...I randomly already had a package that has been sitting in my attic for 3 years leftover from a project I decided to never start...I know...random)
1.5 cans yellow spray paint (I used Krylon's Sun Yellow)
Strip of Velcro
Hot glue gun
Package of hot glue sticks (I bought a bag of 50 sticks and used almost all of them)
1 piece of white felt
1 piece of black felt
1 piece pink felt
1 package black pipe cleaners
1/4 yard white chiffon (Make sure you can see easily through it first. Another option is tulle)
3 yards blue fleece
1/4 yards black fleece
1 yard yellow fleece (Try and match it with the spray paint)
Sewing machine & thread (or you could hand sew if you prefer that)
Safety pins
Fabric cutting scissors
Ruler
Black and brown Sharpies
2 large plastic bowls (got these from the Dollar Tree)
1 package of cheap oats in cylindrical container from the grocery (You will be using only the container obviously so make sure you get the right thing)

First, wrap the foam around the person who will be wearing the costume. Give them a little extra space. Don't make it too tight. Cut the foam to that size. Don't discard what you cut off. You will need it later. Next, cut points along the top edge of the foam. 7 points worked good for me. So measure the length of your foam and divide it by 7 and mark it. You want to make the points about 3.5 inches deep. Connect the dots to make 7 points at the top.
.jpg)
.jpg)
Next, use hot glue to attach some of the foam to make a crown-looking shape. DON'T hot glue the whole way down the side. You're going to want to leave the majority of the back opening open. You will use Velcro later to hold this closed. You won't be able to get in and out of it if you glue this shut. Use safety pins to hold the part that you don't actually glue shut. (PS- DO NOT leave your minions in a hot car or anywhere where it can get overheated. I left mine in the car for a few hours and the hot glue melted and they busted open and it was the hugest mess and took forever to put them back together. Let this be a warning to you all.)
.jpg)
Next, get your bowl. Turn it upside down and start gluing the points down. For some reason it takes forever for the hot glue to dry with these 2 materials. Don't give up. It will eventually attach and it won't be going anywhere (except if you leave it in a hot car). Hold it in it's place until it's totally dry. Attach all the points to the bottom of the bowl. Don't go around in a clockwise or counterclockwise order. Go diagonally. You'll have to force some of the points to fit. This took me forever with my first minion and I was getting so frustrated and almost gave up. Just be patient and it'll work. It won't be perfectly domed. The OCD part of me was really bothered at first but once it's all done you won't really notice. The woman with the blog had crooked-topped Minions too. I didn't even notice until I was experiencing the problem and went back to look to see if her's were the same. Just goes to show that you're way more critical of your own work. Only you will really notice the flaws. It's impossible to get it perfect with this foam. With another material it may be possible. You're on your own with that one, though. It's okay if the top looks messy because you won't be able to see it.
.jpg)
.jpg)
.jpg)
Here's a picture of the inside.
.jpg)
Next, put your dome on your model's head and find where their eyes and arms are. One of my Minions had 1 eye and the other had 2. Up to you. Use the oats container to trace circles in those spots and cut them out. Again, it's okay if they're not perfect...they'll be fixed later. I cut larger holes for the arms keeping the basic circular shape at the top. You won't be able to move if you have a tiny circle to put your arms through. (Ignore the triangles at the bottom...I messed up but they won't be noticed later)
.jpg)
.jpg)
Don't I have an attractive model? Heh
Next you get to spray paint. Obviously you should do this outside. It dries fast. I waited maybe 20 minutes before I brought them back inside.
.jpg)
Next, cut out an 1 inch thick ring from the oats container and made sure it fit in the hole. Adjust the hole accordingly. You want the ring to fit inside it snugly. Hot glue the ring shut to make it a complete circle. Get some of the black fleece and glue a strip around the inside of the ring and hot glue the ring inside of the hole.
.jpg)

.jpg)
(Ignore the circle on his face...long story. I had to turn him inside out and start over because of that. Good times)

Have a little excess fleece on one side of the ring and glue the excess fabric around the inside of the holes. After this, cut out a long strip of black fleece and glue it around the entire head starting at the eyes. This will serve as the goggles strap. You'll have to cut it at the back where the opening is.
Next, glue the white chiffon inside to make the eyes. Make sure it is really tight.

Next, cut out a black circle of felt that is about an inch wider around than the eyes. I used a small cereal bowl to trace this shape. It was perfect. Once you've done that, trace a smaller circle inside of that larger circle and cut it out. Do this for each eye and glue it on.

Next I made the mouth. I made a template of what I wanted it to look like on a piece of paper and used that as reference. I used the black piece of felt for the base of the mouth and pieces of the white and pink felt to cut out the teeth and tongue. I put the finished product on top of a piece of the yellow fleece and cut it out. He needed some lips! It just made it look more finished with that last touch.

I measured our arms and sewed the sleeves. I made them bigger at the top and got a little bit smaller towards the wrists (obviously). Just make sure you don't make them too small. Then glue the sleeves around the inside of the arm holes in the foam. I used a few safety pins for extra hold. Put it on your model and cut the sleeves where the wrists are.
.jpg)
Next is my favorite part: The hair. I cut the pipe cleaners in half and hot glued them into place. They hold really well. I put a little dolp of glue on the spot I wanted the hairs and then stuck the pipe cleaner through the glue and the foam.
.jpg)
.jpg)
This is what we have so far! Creepy, eh?
.jpg)
Next is the pants. This was the most intimidating part for me. I recently (like 2 weeks ago) learned how to use a sewing machine. It wasn't too hard. Was it perfect? Heck no. Did it work? Sure!
First I safety pinned the top of the blue fleece to the bottom of the head. It should start a little below the mouth and at the bottom of the arm hole. I put this on my model and put a safety pin where the crotch was. I also marked where the pants wrap around so you'll know how wide to make them. I disconnected the blue fabric from the head and laid it out. I folded the fabric over to make a pseudo leg with half of the width that I had to work with. I then cut the fabric up until a little below the crotch-marking safety pin (You want a little extra room. I forgot to do this with my minion and it gives me a MAJOR wedgie...I guess I have to deal). I folded the other leg over to match the size of the 1st leg and cut off the excess (save this for the overall straps). I pinned the legs and sewed them up. After that I sewed up the butt part, leaving like 5 inches open at the top so you can get in and out of them.
.jpg)
.jpg)
.jpg)
Then try them on your model to make sure they're okay. He loved spending his day trying on my Minion pieces 230 times.
.jpg)
After this I glued that excess foam that I cut off at the very beginning to the bottom of my Minion head. If you don't do this the pelvic region won't look domed. I hot glued it (again, it takes time to hold but it will eventually) and safety pinned both sides for extra support. I kinda eyeballed it and cut leg domes at the bottom.
.jpg)
.jpg)
I then shimmied my pants onto my Minion (this takes a while...it's harder than it looks) and safety pinned it back on. I then tried it back on my model before I glued it to make sure everything was the right size.

I then glued the top of the pants to my minion head (being sure to match up the back seam of the pants exactly with the back of the Minion). I cut out a blue rectangle for the top of the overalls (mine was 12.5 inches x 7 inches) and cut long 1.5 inch strips for the overall straps with the leftover fabric from cutting the pant legs. Glue all of this in place. I looked at the logo and traced it onto the white piece of felt with a pencil and cut it out. I cut an oval out of the black felt and glued it to the back of the logo before gluing it to the actual overalls.

Hot glue the strip of Velcro to the back opening of the Minion head.

Try it on your model! He's so cute! After I thought I was finished I realized that he desperately needed a pupil.
.jpg)
I drew the eyeball on with brown and black Sharpies. You can still see through it. It's easier to do this on the white chiffon after it's already glued in place because it's pulled taut. When it's not pulled taut it's impossible to draw on. That's why I recommend adding the pupil AFTER you put it in place instead of before. It's also harder to glue it in the right place if it's already drawn on.
I got black gloves and yellow socks on Ebay/Amazon to finish off the look. We both have black shoes. Our bodies are in no way visible with everything on.
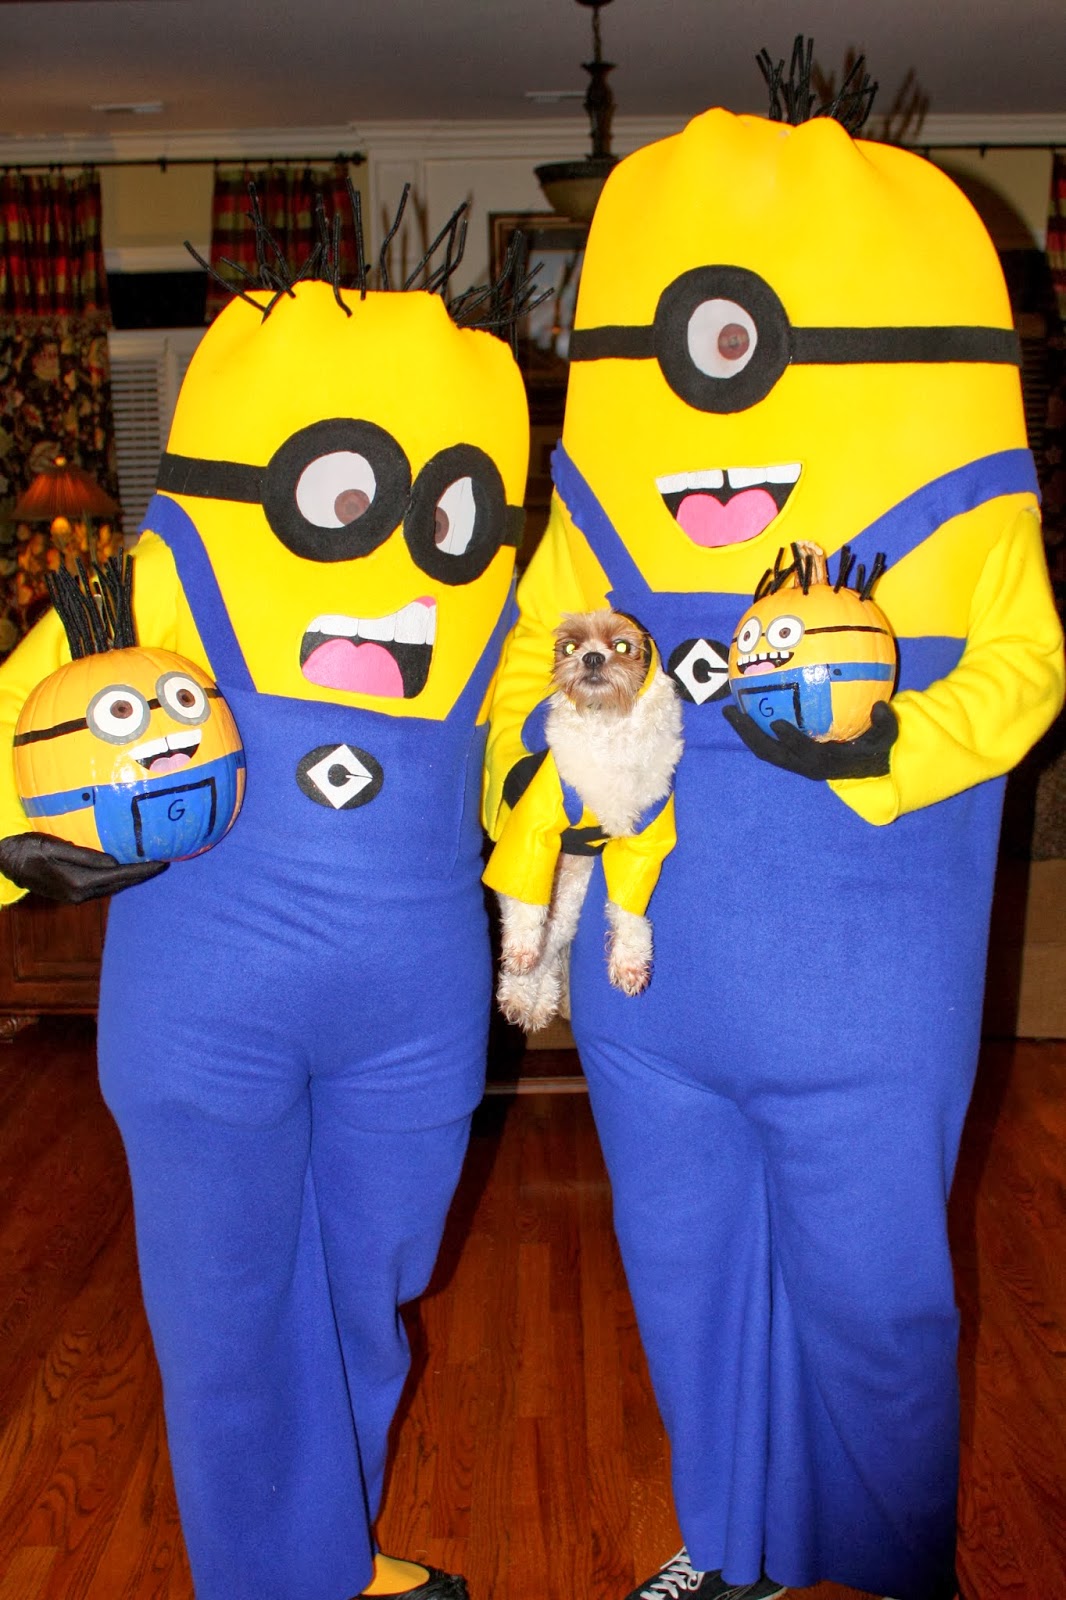
AREN'T THEY CUTE???

.jpg)
I call this next one Mona after the Mona Lisa. Literally no matter where you are he always looks like he's looking at you. He's also like those creepy heads in the library at the Haunted Mansion in Disney World. This actually pleases me because, as you know, I'm obsessed with Disney. Maybe I should name him Walt!
.jpg)
Speaking of cute, my dog loves them. She chills with them all the time. I think it's hilarious. My dog also loves to watch TV. Like she actually watches it. And if I turn it off she stops and looks at me like "Why would you do that?" She actually stepped on the remote and turned the TV on all my herself the other day. I was sitting on the couch on my computer when the TV just turned on and she was standing on the remote. Then she sat down and started watching it. I don't like to think of that as coincidence...she's a person. Now that we've established that fact, of course I had to make her a Minion costume too!
.jpg)
This is Elphie and her BFF watching TV.
.jpg)
.jpg)
Here are the supplies needed:
1/2 yard yellow felt (Try and match these colors with the Minion's fleece to keep things similar)
1/2 yard blue felt (Felt is easier to deal with because it doesn't stretch and it's cheaper so that's why I used it for her and not us)
Leftover white chiffon
Black and brown Sharpies
1 piece of black felt
Leftover white felt
Sewing maching and thread (Again, or you could hand sew)
Cute dog
First I made her world's tiniest yellow shirt...had to start over.
.jpg)
.jpg)
.jpg)
Don't I have the cutest models?
I then made a bigger shirt (using yellow felt and the sewing machine) and put it on her.
.jpg)
I hate measuring so I basically did all of my adjusting after it while it was on her. She just sat there and let me do it. I cut it to a better length and cut a dome shape into the neck where I thought it should be. Then I cut the gap hanging down at her neck down the middle. I hot glued a piece of Velcro where it needed to close. It's easier to do this while it's actually on the dog.
.jpg)
I then cut the whole bottom down the middle so it's easier to take off and put on. Here's the tiny shirt now.

Then I safety pinned a long rectangular piece of blue felt to the tiny yellow shirt and put it on her. I cut it to adjust it to her body again while it was on her. I also added the Velcro to this as well while it was on her and made it match up with the bottom of the yellow felt.
.jpg)
I cut a dome shape at the end of the blue felt so it would fit around her legs and glued the blue felt to the yellow felt. At this point I added more Velcro to make sure it was totally secure.
.jpg)
.jpg)
Then I added the details! The straps, blue rectangle for the overalls, and the logo.
.jpg)
She liked chillin with her Minion friend at her final fitting.

Next comes the head piece. Cut out a piece of yellow fabric and use a safety pin to pin it snugly around your dogs head so it won't fall off. I then started referring to her as the flying nun. She loved this part.

I cut out a headband-like shape that was wide enough to fit details on the top.

She was falling asleep....or angry. Not really sure.

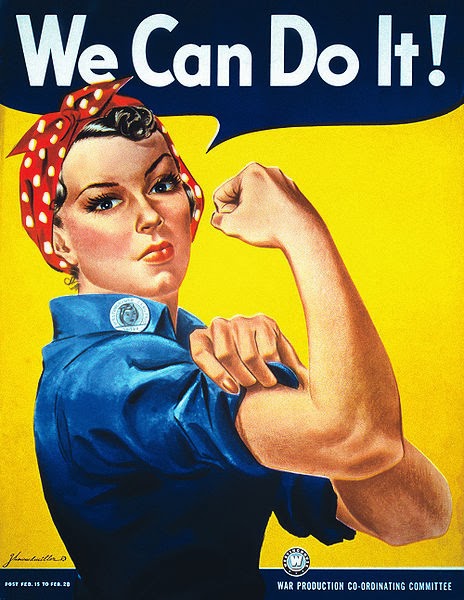
Why does that last pic of her remind me so much of this chick? Idk...
I removed it and glued it shut where the safety pin is (or you can sew it). I cut a hole in the middle and glued a strip of black felt to make the goggle strap and cut out circles for the actual goggles. I glued a piece of white chiffon to a piece of white felt and drew the same eyes on it like I did on ours. I wanted them to be uniform and Sharpie doesn't draw the same on felt as it does chiffon. Consistency is key!


Then put it on your dog!! Now she can fit in with the fam and she's never been happier about it!


My husband and I are Jr High leaders at our church. The weekend before Halloween we go on a Fall Retreat. On the last night there's always a costume contest. I finally got to whip my Minions out for the first time (3 months after I made them). The kids loved them. I must say, though. They were HOT!! Just keep that in mind.


We always go to my in-law's for Halloween. There I got to whip out Elphie's Minion costume (again, 3 months later).


I also made these little monster cupcakes. I was going to make Minion cupcakes but it was starting to be overkill. I thought the 3 costumes and 2 pumpkins were enough :)


I hope this helps someone! If you decide to take on this project please let me know. I'd love to see pics!
I hope yall had a magical Halloween. Guess what's next!! THANKSGIVING!! In my other life I'm a holiday fairy. I love them all!
Hope yall enjoyed.


We always go to my in-law's for Halloween. There I got to whip out Elphie's Minion costume (again, 3 months later).

I also made these little monster cupcakes. I was going to make Minion cupcakes but it was starting to be overkill. I thought the 3 costumes and 2 pumpkins were enough :)


I hope this helps someone! If you decide to take on this project please let me know. I'd love to see pics!
I hope yall had a magical Halloween. Guess what's next!! THANKSGIVING!! In my other life I'm a holiday fairy. I love them all!
Hope yall enjoyed.
How very creative you are. You are such an inspiration and makes me realize that its the little things that makes life more enjoyable....keep posting ideas
ReplyDelete