So this summer I decided that I wanted to tackle my momma's house. Her house is beautiful but a lot of the furniture in it was hand me downs from different times and things just didn't match. It bothered mom but she just never did anything about it...so that's where I came in. It just needed a little updating, that's all. It was definitely a summer-long project. I'm so happy with how it came out and, most importantly, so is Momma. Most things were Pinterest inspired. Here are some things that we did:
Dining Room
Painted it green (was originally red)
Rearranged cabinets/shelves a bit
Got a new table runner and center of table decor
Hung curtains
I love this burlap ruffle table runner I found on Etsy. Here's the link to the seller:
I got the candelabra thing at Ross I think for $6.
I love the cool green color. It came from Lowes. It is Valspar's Betsy Ross House Moss. I personally would've have thought that any color with Betsy Ross's name on it should be red, white, or blue...but I guess this makes sense to someone.

We were contemplating not going through the trouble of getting curtains but they really did finish the room. I actually surprised my mom with these. She was in Destin and my grandmother and I went shopping for curtains, found these that we loved at Bed Bath and Beyond, and I hung them before they got home. She had no idea. I will say that I'm pretty skilled with my husband's drill now. If you're smart, however, you'd get the husband to hang the curtains. These were such a pain to hang. We originally bought 4 panels, but after hanging just 2 we knew that 4 panels were entirely too much. We didn't want to block the view out of the window...plus their dog Phoebe would get very upset because that's her favorite lookout spot. I loved how they look burlapy. They were a tad too short so we ripped out the hem and there was some extra fabric. I created a new hem using fabric no-sew stitching glue. You'd never notice if you didn't know I did that. I also tied them back using some pretty brown ribbon I found at Michaels. The rod we kind of created. At Bed Bath and Beyond they have build-your-own type curtain rods. We had to buy 3 rods, 2 connectors, and 2 finials (these came together). Turned out pretty good I think. Momma was very surprised and loved them.

Living Room
New mantle decor
New piano decor
Almost entirely new wall decor
New couch
Replaced the table tops with tops my dad & I made
Painted a mirror and added initial to it
Etc.
I found these doors at a warehouse in Cordova. I don't think it's open to the public. We knew someone who knew someone, etc. I thought they had potential.
I rubbed them with bleach first to remove all signs of mold and then I painted them to my liking. My dad then beat them up with a heavy chain to make them look older.
We found the vinage looking glass doorknobs on these things (above). They were on the clearance aisle at Hobby Lobby and were literally $5 each. My dad had the backplates for them in his garage that I debrassed. We also got the iron scrolls (below) at the same warehouse as the doors.
New mantle decor! Some people find the door being on the mantle strange, but I think it's kinda cool and definitely different. It's just a really tall room and something tall and interesting needed to go there. I got the wooden candlesticks on the left at Ross (they were really cheap...as is everything there) and I got the birdhouse that is on the right at Hobby Lobby. The other things she already had.
.JPG)
I really wish I took a before picture of this so you could appreciate it's beauty now. This was a framed picture of a topiary...yes...the strangely shaped shrubbery. We have literally had it in our house for as long as I can remember...it was definitely time for a makeover. I had mom paint the frame (it was a rosey red and green before) brown, first. I covered the topiary with this cute fabric I found at Premier Fabrics. I printed an 8x10 of my parent's from my wedding and matted it with scrapbook paper and stuck it in the middle with glue dots. Tada!!! This is the tiny hallway going from the living room to their bedroom.

Before the makeover, the piano had a big shelfy thing above it covered in trinkets. It was nice, but I was tired of the trinkets (again, because they've been in our house for forever). The fruit picture (above) had also worn out its welcome. I painted the frame blue and distressed it a bit by sanding it and being sure to not cover the entire thing with paint. I then covered the fruit with more Premier Fabric. These 6 little frames inside I got at Michaels for $3 each (coupons!!) and painted blue as well. I removed the backs of the frames and had momma glue the glass to the frame with E500 glue (so the glass wouldn't fall out since the backs were gone). I had to meticulously measure exactly where to hang the frames within the big frame. This took a lot of brainpower for me...especially since I was on summer break. Anyways, I did it then hammed a nail straight through the canvas and into the wall on the other side and hung the pictures! They are 5x7 and can be changed out whenever because the frames are easily removed and the pictures are simply taped inside. Pretty cool!
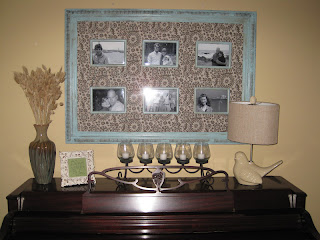
I got the vase on the far left at TJ Maxx as well as the frame (below) and the cute bird lamp. I wrote a Bible verse on some scrapbook paper and put it in the TJ Maxx frame. I figured we had enough pictures in that small area. I got the pussy willow type things that are in the vase at Michaels. I got the candle thing at Burlington for $9.99.
The fruit picture was originally hanging here before I tore it apart. Momma really wanted a canvas print of one of our engagement pics and this one is one of her favorites. We ordered it here for a very good price:
It came quickly and in perfect condition. I definitely recommend it. The birdhouse on the left I got at Ross last year and used in my wedding. I filled the bottom with moss that I got at Michaels just because it looked naked when it was empty. She had all of the other things. I did a lot of rearranging of things that she already had.
This is one of my favorites! This mirror was originally gold (which I wasn't very fond of..it was just too formal and we wanted it to be a more informal and fun environment). I painted it brown with a little bit of red. I foud the "C" on Etsy also. Here's the link to the seller:
Just a warning...this literally took 10 weeks to arrive. It says it will take 6-8 weeks for shipment but in my case it was much longer. I wasn't in any hurry though...as long as it eventually came.
We replaced the lamp shades with paper-bag lookin shades we found at this weird overstock store we came across off of the interstate. They were like $5 a piece. I got the cross, big candle, and picture frame at Hobby Lobby and the candle stand at Tuesday Morning.
I rearranged these shelves (above) a lot. I got those wooden letters at Hobby Lobby and painted them. That container at the bottom left now has some mossy balls in it.
The picture above is a before picture of the couch-side table (and also a piece of the old couch). I also purchased that lamp and little bird at TJ Maxx.
Here are some pics of me and dad's little project:
Dad's man garage. Yep...that's a Mustang body on a rotisserie that dad welded himself. IDK.
No more constant Windexing because these 2 tables are no longer glass! You're welcome for that, Momma.
And here's a picture of their cute new couch!! It's the perfect size for that little spot. We found it at Ashley's in Cordova off of Germantown Parkway.
An overall view of the living room.
Note: This is before we finished the tables.
Kitchen & Keeping Room
Rearranged cabinet top decor & removed most of the fake greenery
Decluttered
Painted a table
New wall decor
Added a few extra special touches
I found these shutters at Sheffield's Antique Mall in Collierville (aka heaven on earth). They were green before but once I hung them I realized that the green was way to bright and limey. I painted them the same color as the dining room and had my dad screw them into the side of the cabinet.
This piece of furniture was really buggin me. It was too fancy...and the fruit? Why? So I painted it with leftover paint I had from painting Matt's man room. It was Behr's paint and primer in one so it covered perfectly. I painted some streaks of brown on it as well to give it more depth. I also hung that "C" thing. Here's a link to where you can find out how I made that:
I love their kitchen. I really didn't have to do much in here.
I gave them that picture frame with some wedding pics for Christmas last year. I got it at a craft fair. I also made that little "Welcome" chalkboard out of a silver tray that I got at a thrift store for $1.50 and chalkboard paint. The red chicken came from Hobby Lobby.
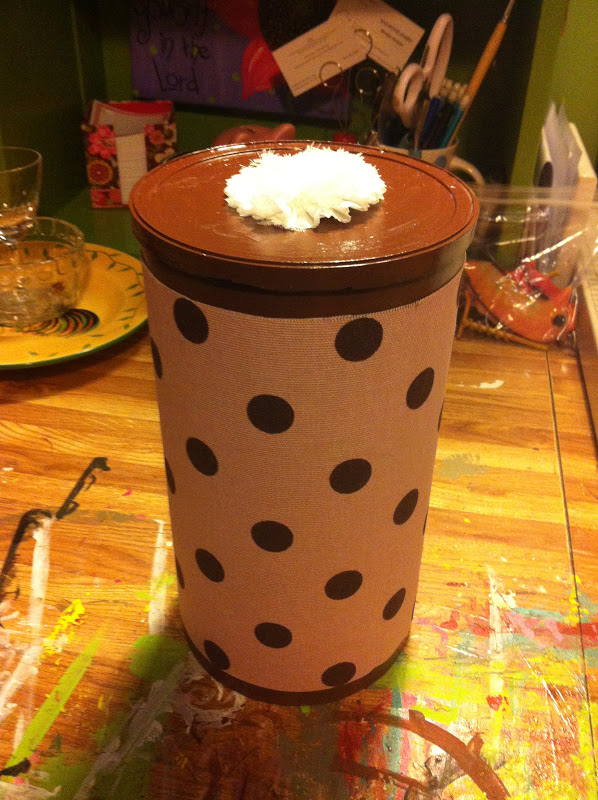
This little box sits on the table by the couch in the keeping room. The sticker came off of it years ago leaving residue and it's been really bothering me...so I fixed it with scrapbook paper and Mod Podge!! It was a 2 second fix.
Cute little table in the keeping room. She had all of these things.
My dad helped me out with this one. I had him cut wood at random lengths and nail them together. I then painted it with a Bible verse! It hangs in the keeping room as well.
Laundry & Back Hallway
Decorated it for the first time...I mean most people don't care to decorate their laundry room like I do
The laundry room had to be cute too!! I made the "Laundry" sign out of some wood I found it dad's garage and I used a stencil to paint onto it. I also Mod Podged some pics onto square flat canvases (after I painted them) and hung them with wooden pant hangers that I got at Target. Found that idea on Pinterest, of course!
Also got this idea on Pinterest. I got footprints of all of our dogs and framed them in the back hallway. I thought it was cute.
Momma's Bedroom
Repainted almost all of the furniture
Rearranged shelves
New dresser decor
New over-the-bed decor
Handmade curtains by yours truly
Painted the brass handles on the dresser & bedside tables
Recovered bench
New bedspread & pillows
I painted this cabinet white and streaked it with Palladian Blue (found it in Mom's attic). I've seen the Palladian Blue color thrown around on Pinterest everywhere. It really is beautiful. I think it is the color of the ceiling in their bathroom. The walls in here are a little different. You can't see in these pics but their ceiling is a nice brown. I just love their room.
The handles on this dresser used to be brass. I had Momma spray painted them with hammered silver spray paint. Totally changed the look and gave the furniture a nice updated look. I got the frame on the far left dresser at Marshalls, the bird at Tuesday Morning, I made the frame on the right, and the birdhouse on the far right I got at Marshalls. I filled the birdhouse with mini grapevine balls that I got at Tuesday Morning as well.
.jpg)
Another thing I did while my family was in Destin was make curtains for their bedroom. Momma found this fabric that she really liked at Premier Fabrics but I don't know if they were ever actually going to get made...so I did it. I just used Stitch Witchery (I got it at Michaels) and ironed along the sides of each piece of fabric. I used 3 yards per panel and I needed 6 panels. It tells you how to use it on the package. This was very easy but very time consuming. I hung them on curtain rods (from Bed Bath and Beyond) with clip rings. So simple! Anyone can seriously do this. I can't sew (so that was our of the question) and I'm not very good at ironing but I could do this!! It totally finished the room.
Misc Organizing Adventures
Lastly, I organized some random things around the house. Here are a few pics of some closet before and afters.
This concludes my segment on Momma's house. My summer project has come to a close which reminds me that summer is almost over. Makes me so sad. I am, however, to get this Senior year show on the road. Graduation in 271 days!! Can't come soon enough.
Here are a few collages I made of before & after pics of my house. The before pics were taken a little over 3 years ago when I moved in and the after pics are current.
Happy decorating!!




.jpg)

.JPG)


.JPG)


.JPG)
.JPG)


.JPG)
.JPG)

.JPG)
.JPG)


.jpg)
.JPG)
.JPG)
.JPG)


.JPG)
.JPG)
.jpg)
.JPG)

.JPG)
.JPG)
.jpg)


.JPG)
.JPG)
.JPG)
.JPG)
.JPG)
.jpg)
.jpg)
.JPG)
.jpg)


.JPG)
.JPG)


