Tuesday, December 8, 2015

Christmas Decor 2015

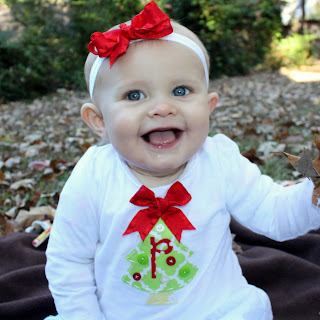
My inner elf has resurfaced because my time has come. CHRISTMAS! I'm obsessed. I thought maybe this feeling would fade some as I got older. But here I am. A 25 year old wife and mom. I might be more excited about this Christmas than I ever have been because we have a BABY! I'm so excited for Presley's first Christmas. She'll have no idea what's going on but that is completely irrelevant. She will have hundreds of pictures to look at later and pretend like she knew what was happening. 

So last year was our first Christmas in our house. I was so excited to finally have a mantle to decorate. I thought about what I wanted to do with it all year. The possibilities were endless! I came up with something but after I got finished I wasn't at all pleased with the outcome. I was 8 months pregnant so I didn't really have the energy to completely redo it. This year, however, I wanted to do it right. Plus I used that window with the wreath on it as decor in Presley's playroom and it is now pink sooo that's out of the question. 

I wanted to stick with the traditional red and green color palate but I wanted it to be fun and whimsical. I started Christmas crafting in July (when I begin all of my October-December crafting) and I was so excited to see it all come together this year. I didn't really get to see it all put together till the day we brought out all of our Christmas decor. 

Last year (2014):


This year (2015):


I'll start with the mantle. The first thing I needed to do this year was add another stocking! I went to Joann and got coordinating fabric and made Presley's from scratch with the help of an online tutorial. I used our stockings as a template so they'd all be the same size. I learn how to do everything on YouTube. After I finished it I had it monogrammed with her name. Santa stopped by a little early this year.


 The next thing I did was make fabric/ribbon garland. This took forever but it was so easy and I mostly used ribbon and scraps of fabric I already had on hand so it was almost free! I bought about 1/4 yard of 4 different cheap green and red fabrics in different shades. I cut them into strips and slip knotted them onto some jute (you can use any ribbon or even yarn). I like jute because it's thicker and sturdier. I used a lot of red and green ribbon as well (solid and patterned). I wrapped it around the prelit garland and added lime green and red mesh to get the final product. 

I love the mesh. It's so forgiving and easy to use. You can get it really at any craft store. I got mine at Hobby Lobby for 50% off (so $4 a package). You just cut pieces and stuff it until you like it. There's really no method I used. 


Now the chalkboard! I was so excited about this because it cost me $2! I've mentioned before that when I was a freshman in college I became obsessed with garage sales. I loved buying things and redoing them (especially furniture). I brought in so much stuff I didn't have anywhere to put it in my tiny house. Most of it ended up in the attic and I forgot about it until we moved about 2 years ago. I'm so glad I got these random things for so cheap because I've used almost all of them in our current house. I just needed the space and the right place! Amongst that stuff was the wooden frame. I got it 6 years ago at a garage sale in Heber Springs, Arkansas.  It was a whole dollar. I painted polka dots on it with white acrylic paint. The chalkboard part is actually foam core board with chalkboard paint. I already had the paint so I just had to buy the board. So easy! And I can write and erase anything on it and it doesn't even have to be Christmas.

Lastly for the mantle, the big felt ornaments and snowflakes! I got them at...THE DOLLAR TREE! They have glitter on them but I just turned them backwards so the backs are showing. I attached them with command strips. The red felt ornaments needed some love. I had the green ribbon on hand. I taped them up and added the green bows. I didn't like them just floating there. I got the little foam snowflakes at The Dollar Tree (12 for $1). I put these in my trees as well! 

The sequin ball garland draped on the chalkboard I've had for years. I have no idea where it came from. 

I'm obsessed with sewing and specifically making envelope pillow covers so of course I needed to decorate my pillows. I just made simple covers for each of my couch pillows and it really made the room instantly more festive. The polka dot and striped fabric I got years ago after Christmas on sale at Premiere Fabrics. I pooled it around my tree as a make-shift tree skirt for years but I got a real skirt this year. So I used the fabric to make these pillows! For the other pillows I got the red polka dot fabric at Hobby Lobby really cheap. The green fringe edging was in the fabric clearance section for $7 and came with 10 yards. What a deal! Just what I needed. It'd usually be $2-3 a yard so I was happy about that. 


I made little yarn trees a few years ago and redid them this year to match better. Just wrap yarn around a cardboard cone and glue little pom poms on them. So easy. Click here to go to the original link when I made those.


I made a little bow and stuffed some mesh in my wreath. Seriously can't stop with that stuff.


 Look at this sweet little nativity! I got it as a gift at one of Presley's baby showers and I just love it. She'll treasure it forever.


Speaking of, Pres Pres loves the tree. She's mesmerized. We had to be super strategic with our ornament placement this year because we have a crazy crawler in our midst. She loves to touch the ornaments within her reach (that aren't breakable). Man I love her. 


And now the tree! We got a new tree since last year. Our previous one was old and really small for the space. So this year it found a new home in our dining room while this one feels much fuller and cozier in our living room. We put white lights on it to match the mantle garland. I bought red felt ribbon (Michaels) and lime green polka dot ribbon (Hobby Lobby) and made my own bows. So easy. Be sure to use wire-edged ribbon. I just measured the ribbon (so they'd all be the same size), tied a simple bow, looped a piece of wire through the back for easy attachment, and used a lighter to sear the cut edges (it melts the ribbon a little bit and keeps it from fraying..just learned this trick and it has changed my life). I added little foam snowflakes all throughout it. I just sat them in the branches. Of course I put some green and red mesh up in it as well. I got my new gold and ivory polka dot skirt at Hobby Lobby for $20!


I wanted my presents to match as well. Got my paper at Hobby Lobby (duh) for $4 a roll. I'm obsessed with their paper. It's cheap, comes with like 100 square feet and it's so thick and just really great quality. And it's so cute and there are so many different kinds to choose from! Almost done with my shopping except for a few men because THEY'RE IMPOSSIBLE TO SHOP FOR!!


We hung garland above the door frames and I made the loopy bows on the ends. It's red polka dot wire-edged ribbon from Hobby Lobby. I learned how to make the bow on YouTube here. I've been making alot of these bows for cake toppers recently. They're so fun! 


I made the Christmas card holder a few years ago as well and it was so easy. Here's the link.

Here's our old tree now set up in the dining room. Matt doesn't like my tree hat but I think it's hilarious. Guess you had to be there. I added red/green mesh to this tree as well as ribbon bows I made out of ribbon I had on hand. It has snowflakes in it as well. I used some burlap I found amongst my craft supplies and pooled it under the tree since I don't have a skirt for in here yet. 


One of my favorite Christmas decor items is Matt's office tree. I gave it to him the Christmas before we moved (we moved just a few weeks after Christmas so our old house was all boxed up). It's his very own office tree. It has ornaments that all represent his favorite things. Some are handmade and some I bought. I give him a new one every year. I love the yellow submarine lights and Yoda topper. A perfect man tree. 


We wrapped some lit garland around our banister and I added more mesh (duh) and a few leftover Dollar Tree foam snowflakes. I got the big red mesh bows at an after Christmas sale a few years ago.


Lastly, the kitchen. I made the wreath a few years ago and my mom gave me this cute little baking-themed tree. My placemats came from Hobby Lobby like 6 years ago. 


Phew. Christmas is definitely a tiring time of year but so magical and fun and I'm so excited that it's here. I can't wait to experience it with my very own little person this year. She makes me so happy. My favorite gift. Thank you, God, for my sweet P.


Tuesday, November 3, 2015

Tangled Halloween Costumes

So every year I make my Halloween costumes in July (and I may or may not have written the majority of this in July). Don't judge me. This year I felt like July kinda snuck up on me. I was so behind! I didn't even know what I was going to make yet! I researched for a few weeks and just couldn't decide. I thought I had settled on Star Wars characters. I'm more of a Star Trek person myself (KHAAAAAANNNNNNNNN) but my husband LOVES Star Wars. There's a new movie coming out this year and I can't tell you how many times I've seen the multiple trailers (didn't really have a choice) and heard it blaring from the computer in Matt's office. He is pumped. He is actually going to an all-day Star Wars movie marathon at the Paradiso the day it comes out. They'll watch every movie and end with the new one. Did I mention it's 900 minutes of film so they have to start it at 4 AM? FOUR IN THE MORNING! CRAZY HE IS!!

Anyways, so I did a lot of research on Star Wars costumes and then it occurred to me:  Do I really want my sweet, precious little girl's first Halloween costume to be Wookie in nature? Yoda doesn't wear bows. Jabba the Hutt? She's not THAT chubby. I just couldn't.


 I wanted something cute and happy and not from space. My all time favorite movie is Tangled (the Disney movie about Rapunzel) and Presley and I have already watched it together 5 times in the 6 months she's been in this world (Note: she's now almost 10 months old, we've watched it more like 12 times and it's currently playing as I write. OBSESSED). So duh it's going to be her favorite movie too. She has no choice. I did more research and was completely inspired. AND AT LAST I'D SEEN THE LIGHT! The fog most definitely had lifted. WHY DIDN'T I THINK OF THIS SOONER?


I was going to be Rapunzel, Matt was going to be Flynn Rider/Eugene Fitzherbert and Presley obviously had to be Pascal. But a cute girly version since technically he's a boy. These costumes weren't hard to make at all and were pretty inexpensive! About $40 for all 3 (granted I had a lot of the supplies on hand).

Here's my sketch. Not all of it happened exactly how I drew it out but here was my original thought process. I got pretty close.


I've mentioned before that Matt and I are Jr High leaders at our church. Every year we go on the Fall Retreat to Lake Forest Ranch in the thriving metropolis of Macon, Mississippi. It's usually around Halloween so we have a costume party and that's when I like to bring out my 'stumes for the first time. Then we go to my in-laws on Oct 31. This year the retreat was ON Halloween and we have a baby. I couldn't be away from her on her first Halloween (and I also am still breastfeeding making it hard to be separated from her) so we took her with us. She was the youngest leader to ever go on that trip since she helped me lead my small groups. Presley and I had our own special room so we didn't disturb the other people and I had privacy to nurse and take care of her. My 8th grade girls LOVE her so they were so happy to spend the weekend with her. She, of course, loves them as well because she gets all the attention. They loved our costumes!. I was amazed at how well Presley pulled off the whole chameleon look. Granted the costume party wasn't until 9:30 PM and the music was loud and Presley got really stressed out and was tired so we lasted a good 10 minutes. Worth it.

So without further ado... 

Rapunzel


Supplies:
Purple base dress (thrift store if you don't own already)
White 3/4 sleeve shirt
Solid light pink fabric (1/4 yard)
Gold ribbon
Purple decorative ribbon
Lace trim for neck (maybe a yard)
Small lace trim for sleeves (2/3 yard)
Satin ribbon in pink or purple
Pink ribbon
5 yards each of pink and purple tulle
Frying pan (optional)

I started with the most intimidating costume first. At least to me it was. I didn't know where to start. I thought about it and made some sketches and decided I needed a base dress to begin with. I didn't want to start completely from scratch. I didn't trust myself. I'm still learning and pretty basic. I found a purple dress in my closet but I like it and wear it often and didn't want to ruin it. Then I remembered! When I was a Freshman in high school I bought this soft purple dress from Forever 21 in Nashville. I wore it all the time then, but as I got older it turned into pjs. It's so comfy and soft and out of style so why not? Well it was the perfect starting piece to work around and it was okay to glue stuff to. Is it exact? No. Do people get the point if they've seen the movie when they see my costume? Sure! It's more of a whimsical portrayal of the real thing but I like it. It was kinda like Rapunzel meets Fairy Godmother.


I started by cutting out the pink rectangle for the center piece. I actually doubled it and sewed it together because it's thin and a little see-thru, but you don't have to do this. I just found it looked better doubled. Then I got my gold ribbon and criss-crossed it while hot gluing it in place. I added a little gold bow in the upper center. When I was done with that I hot glued the purple decorative ribbon down the side to cover up the edge. Then I hot glued the big lace trim around the neck for a more feminine touch.

Next I did the sleeves. I had some batting scraps on hand from a t-shirt quilt I made a few years ago that were perfect. I cut and glued them together like this.


Then I stuffed them in the sleeve and hot glued them in place. I cut strips of the pink fabric and hot glued them on as well (only glued at the top and bottom).  Make sure they're evenly spaced and the same as the opposite sleeve. I added pink satin ribbon bows to the center of the sleeve bottoms as well. 

The skirt took forever but was totally worth it. I cut long strips of tulle and slip knotted them onto a long piece of the thicker satin ribbon. I didn't like the look of how the tulle looked knotted at the top when I was done so I glued this pink ruffle ribbon around the top to hide it and then hot glued it to its place on the dress as well. I only glued it in place in the front, not in the back. Here's the tutorial I used for the skirt that was really helpful (especially when cutting all of the strips):


Super easy just a bit time consuming.


Lastly, I had a ratty looking 3/4 sleeve white t-shirt in my closet that I don't really wear anymore (well, because it's ratty). So I donated it to my own cause and used the little lace trim to sew around the ends of the sleeves. Is this necessary? No. I just liked the extra touch.


And that was that! Not so bad!

Flynn


Supplies:
Blue denimy button down (thrift store for a few bucks)
Longsleeved white t-shirt ($5 at Hobby Lobby)
Thick brown belt
Khakis
Boot covers (Ebay) or actual boots
Brown Satchel (optional)


This one was so easy! I cut the sleeves off of the blue shirt to give it a capsleeve. That's it with that. I cut out a large "V" from the white t-shirt and rolled up the sleeves. Put the belt around the the top of the blue shirt and you're finished from the waist up. 


I found these pirate boot covers on Ebay for $10 because they were used and the elastic around the bottom of one of them was broken. They're in perfect condition otherwise and a super easy fix with my machine. You wear them on top of black shoes so it gives the illusion that you're wearing boots without the price tag (unless you have man boots on hand which I don't). I would've gotten brown ones but they were way more expensive because they would've had to have been bought new and I'm cheap. I didn't like the laces on them because they looked too, well, piratey. Flynn wasn't a pirate. So I removed the laces, sewed up the front of the cuffs and sharpied the silver holes so they were less noticeable. I was going to spray paint them brown but Matt didn't have matching shoes which was a problem. If it really bothers you you could buy cheap dress shoes and spray paint the boot covers and the shoes so they'd match. I don't think anyone noticed they were the wrong color though.

Here's what they looked like originally:


Pascal


Supplies:
Green onesie (Target.com)
Lime green fleece fabric (1.5 yard)
Tulle in 2-3 different shades of green (about 5ish total yards)
Green Ribbon
Big white pom pom balls
Felt in 2-3 different shades of green
Big brown matching buttons and 2 small black ones
Pink bow (optional)
Long piece of thick wire or wire hanger
Stuffing
White tights (optional)


I love this little costume and how it turned out. I started with the green onesie. The cheapest one I found (and with long sleeves for October) was on Target.com (not sold in stores). It's made of organic cotton. Fancy. I cut out an oval of the fleece and hot glued it on the front to tie it in to the hat. I sewed the same little lace trim around the sleeves just like I did my white shirt. Not necessary but I loved the girlyness of it. Is that a word? Then I cut out little triangles of the different green felts and hot glued them down the back. Easy as that.


Next I made the tail. I just cut out a long piece of green fleece (that I had leftover from my pregnant belly Mike Wazowski costume from last Halloween) and gradually gave it a point at the end. I actually traced and cut this out while it was folded in half long ways so it'd be even all the way around. I sewed it up and turned it right-side out. I filled it with a little bit of stuffing (using a wooden dowel to help me get it all the way to the bottom) then stuffed up a long piece of thick wire. This helped me to make it curl well. I hot glued the curl in place then glued a few more felt scales to the top. I folded the ends of the fabric over and hot glued them. I didn't attach this until she was going to wear it. It made putting it on her much easier. I just used a few safety pins.


Then I made the hat which was surprisingly really simple. I used this tutorial that walked me through everything and even had free patterns you can print off:


After I made the hat using the pattern and instructions above I added pom poms for the eyes. Then I glued the buttons in place and gave them eyelids out of fleece scraps. I glued on the bow last.


Last but not least, the green tutu that's most definitely my favorite part and so easy to make. Still takes a while to do but way less time consuming than the adult one. Much smaller and the pieces of tulle are way shorter. I used this tutorial:


Easy peasy. I put it on Presley right after I finished making it and she loved it so much she started eating the tulle. BUT LOOK HOW CUTE SHE IS OMG!! (PS she was 6 months here and she was so bald and chubby OH MY GOODNESS she's grown so much ALL THE FEELS)


And here is the final product! I'm so mad I didn't get better pictures that night of the whole fam and Matt's whole costume (showing his boots) with the fancy camera. I did take some good pics of Presley after we got home.  As for the rest, Iphone pics will have to do.


HOW IS SHE SO CUTE I DON'T EVEN KNOW!


So there you have it!! I hope you enjoyed. As always, can't wait until Halloween next year!!